
Home Blog Page 36

9 Best Free Optin Form WordPress Plugins to Grow Email Subscribers

0

Since the internet’s earliest days, marketers have understood the importance of collecting an email list full of targeted, engaged subscribers. It’s one of the most effective ways of generating a profit online.

List building is one of the most important thing in blogs. In short, it’s a highly personal way to build a relationship with an audience.

But the question is how we can get subscribers. The simple answer is to add a good looking light weighted optin form.

8 Best Pro Optin Form Plugins For List Building

Best Optin Form WordPress Plugins

#1. Subscribe Forms

Create Beautiful Professional looking Subscribe Forms easily in less than 1 minute and increase your conversions/Subscribers more than 300%. With MailChimp Subscribe form plugin you can easily change the styling of your forms in no time to match the styling of your theme. Now its time to get rid of boring white and grey subscribe forms on which no one pays attention.

[su_button url=”https://wordpress.org/plugins/mailchimp-subscribe-sm/” target=”blank” style=”stroked” background=”#e64e4f” color=”#ffffff” size=”9″ center=”yes” radius=”round” icon=”icon: paper-plane-o” icon_color=”#6dec3e” rel=”nofollow”]Download Plugin[/su_button]

#2. Simple Signup Form

You’ll get the subscription datas to your email address, therefore you can easily add it to your email manager software or mail list. Simple Signup Form is a powerful marketing solution to design your own signup form and put it to all or just some specified pages / posts. The visitors can subscribe with one single click using the Google Plus Signup option.

[su_button url=”https://wordpress.org/plugins/simple-signup-form/” target=”blank” style=”stroked” background=”#e64e4f” color=”#ffffff” size=”9″ center=”yes” radius=”round” icon=”icon: paper-plane-o” icon_color=”#6dec3e” rel=”nofollow”]Download Plugin[/su_button]

#3. SUMOME LIST BUILDER

SumoMe is a free popup plugin for WordPress users. To add the popup function to your website, you have to go to the SumoMe website to download the core plugin. When installed, you’ll be asked to register for a SumoMe account.

SumoMe List Builder works with 12 email marketing services, and a pro version of the plugin is available for $50/month, which gives you access to the seven premium templates and removes the SumoMe branding.

[su_button url=”https://sumome.com/app/list-builder” target=”blank” style=”stroked” background=”#e64e4f” color=”#ffffff” size=”9″ center=”yes” radius=”round” icon=”icon: paper-plane-o” icon_color=”#6dec3e” rel=”nofollow”]Download Plugin[/su_button]

Do Not Miss to Check Premium Collection Of Optin Form Plugins

#4. Email Blaster Newsletter Signup Form

The official email blaster WordPress plugin lets you quickly add email blaster Newsletter Signup form and contact forms to your WordPress site.

[su_button url=”https://wordpress.org/plugins/email-blaster-newsletter-signup-form/” target=”blank” style=”stroked” background=”#e64e4f” color=”#ffffff” size=”9″ center=”yes” radius=”round” icon=”icon: paper-plane-o” icon_color=”#6dec3e” rel=”nofollow”]Download Plugin[/su_button]

#5. MailChimp Forms by Optin Cat

The MailChimp Forms by Optin Cat WordPress Plugin Makes It Super Simple To Create Beautiful MailChimp Sign-up Widgets & Forms In Minutes.

[su_button url=”https://wordpress.org/plugins/mailchimp-wp/” target=”blank” style=”stroked” background=”#e64e4f” color=”#ffffff” size=”9″ center=”yes” radius=”round” icon=”icon: paper-plane-o” icon_color=”#6dec3e” rel=”nofollow”]Download Plugin[/su_button]

#6. Optin Forms

Optin Forms allows you to create stunning optin forms for your blog or website, without the need to know any HTML or CSS. Simply select your email solution, pick a form design and customize its appearance. Add your form to your posts and pages with a simple mouse-click, or use a shortcode to add it to specific posts and pages.

[su_button url=”https://wordpress.org/plugins/optin-forms/” target=”blank” style=”stroked” background=”#e64e4f” color=”#ffffff” size=”9″ center=”yes” radius=”round” icon=”icon: paper-plane-o” icon_color=”#6dec3e” rel=”nofollow”]Download Plugin[/su_button]

#7. WordPress PopUp

From the guys behind WPMU Dev, WordPress PopUp is one of the most popular free popup plugins on the market. WordPress PopUp is the smart, responsive, customizable and beautifully coded pop-up and pop-over plugin for WordPress and Multisite. Pro version of wordpress popup plugin also available.

[su_button url=”https://wordpress.org/plugins/wordpress-popup/” target=”blank” style=”stroked” background=”#e64e4f” color=”#ffffff” size=”9″ center=”yes” radius=”round” icon=”icon: paper-plane-o” icon_color=”#6dec3e” rel=”nofollow”]Download Plugin[/su_button]

#8. Magic Action Box

Magic Action Box let’s you display professional looking opt-in forms and feature boxes in your WordPress site. It  is an easy to use but powerful lead generation plugin that lets you create a focused and high converting feature box in minutes. You can easily add optin form before or after a blog post or page with magic action box. You can also add opt in forms to your sidebar.

[su_button url=”https://wordpress.org/plugins/magic-action-box/” target=”blank” style=”stroked” background=”#e64e4f” color=”#ffffff” size=”9″ center=”yes” radius=”round” icon=”icon: paper-plane-o” icon_color=”#6dec3e” rel=”nofollow”]Download Plugin[/su_button]

#9. Plugmatter Optin Feature Box

PlugMatter Optin feature box is a free list building plugin, also have premium plan. This Plugin enables you to create an optin form that will be displayed between the header and your content area.

It is a perfect alternate for those who hate popups and don’t want to use intrusive methods to get more subscribers for their mailing list. Free plugin have some limitation and can use 2 templates. If you like to add more other templates, go for premium. Or check Other Best Pro Optin Plugin For WordPress

[su_button url=”https://wordpress.org/plugins/plugmatter-optin-feature-box-lite/” target=”blank” style=”stroked” background=”#e64e4f” color=”#ffffff” size=”9″ center=”yes” radius=”round” icon=”icon: paper-plane-o” icon_color=”#6dec3e” rel=”nofollow”]Download Plugin[/su_button]

[su_button url=”https://www.bestwp.org/optin-form-plugins/” target=”blank” style=”stroked” background=”#cf2c1e” color=”#ffffff” size=”11″ wide=”yes” radius=”0″ icon_color=”#c7f2fc” desc=”Recommended For Pro Bloggers, These Pro Plugins increase conversion upto 700%” rel=”nofollow”]Check Out Premium Optin Form Plugins [/su_button]

32 Steps To Increase Your Blog’s Traffic (Infographic)

If you are running a blog then you always want to increase blog traffic. and read many articles to improve traffic of blog. If you really want to increase traffic of your blog. Follow the steps of this infographic to drive more traffic.

You May also Like:


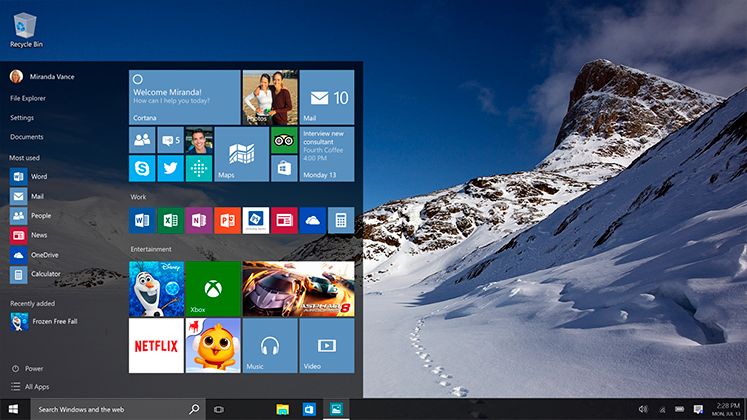
(Fix) Windows 10 Doesn’t Shutting Down Completely

Recently I upgraded my system into Windows 10. And I feel windows 10 is really amazing. But after upgrade i got a problem of laptop sutting down. When i try to shutdown my laptop then the screen goes off but the power light stays on and basically windows 10 does not shut down completely.

Whenever I have to turn on my PC again, I have to force the power button down until it completely Shuts down and start it back up again.

I tried several troubleshooting tactics and visited tons of forums and found the very easy solution to fix this windows 10 issue.

Lots of people already have this problem. so I’m going to share this trick to fix this issue.

How to Fix Windows 10 Not Shutdown Issue:

Here i have given 3 easy solution to fix the windows 10 does’t shutting down issue. Try these.

Solution 1: Device Manager Options

  • Press the windows button and type Device Manager. Click on Device Manger from Search Results.
  • Now click on System Device, available at the last.
  • Here select Intel(R) Management Engine Interface and right click and click on properties.
  • In Properties, select driver. (currently version 11.xxx)
  • Now uninstall and click on OK.
  • Reboot your system.
  • Now your windows 10 issue Fixed. Try to Shutdown.

If this solution not worked for you, Please try the second one.

Solution 2: Disable Hybrid Shutdown Manually

  1. Press the Windows Button and type power options and click on Power Options from search results.
  2. On the left side of the window click on Choose what the power button does.
  3. If needed, click on Change settings that are currently unavailable, underDefine power buttons and turn on password protection.
  4. From the enabled options under Shutdown settings section, uncheck Turn on fast startup (recommended) checkbox to disable Hybrid Shutdown.
  5. Click Save changes button to save the modified settings.
  6. Close Power Options window when done.

If this solution not worked for you, Please try the 3rd one.

Solution 3: Perform A Full Shutdown

Another way to turn off your computer without Hybrid Shutdown is to perform a full shutdown, to do that, follow these steps:

  • Right-click on your Desktop.
  • Go to New, and click on Shortcut.
  • For “Type the location of the item,” input this:
shutdown -F -T ## -C “Your message here” (## can be any number from 0 and 315360000, and “Your message here” could be any text you want))
  • Click Next.
  • Name the shortcut by your wish.
  • Right-click the shortcut on from your desktop and click Properties.
  • Change the icon of the shortcut by your desire, just for the aesthetic reasons
  • Pin the shortcut to your start menu and you’re good to go

We hope any one of these solution will work for you to fix windows 10 issue. If you ahve any questions related to this, Please ask through comments.


How to Enable Shortcodes in WordPress Widgets

0

By default, wordpress shortcodes can only be used in post and page post types not in widgets. If you use shortcodes in widgets then simply text will be display in your blog. But If you also want to use shortcodes in widgets. Then we will guide you propellry to display shortcodes in widgets. In this very short tutorial Im going to share a little snippet to enable shortcodes in WordPress widgets.

Check Out: How to Detect WordPress Theme and Plugins in Competitor Site

How to Use Shortcodes in Widgets:

To add shortcode support in widgets, You need to follow these simple steps.

  1. Go to your wordpress admin dashboard.
  2. Now go to Appearance>Editor>functions.php file.
  3. In functions.php file paste the following code just bellow <?php.
// Add shortcode support to widgets
add_filter(‘widget_text’, ‘do_shortcode’);

4. After adding code, save the file.

Now Go to Widgets section and try to add shortcodes in text widget and save.

Now refresh your site front end and you will see awesome widget in live action.

Note: Make sure you have’t used any cache plugin in this time. If using then clear cache first.

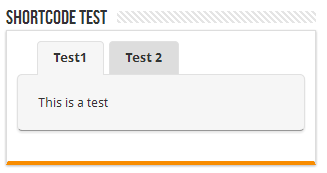
Here is the Snapshot For Testing the Code:

enable shortcode in widgets


If you like This Tutorial, Then Share your Views and also share with your bloggers friends.

7 Best Content Delivery Network (CDN) Providers to Speed Up Your Site

A Content Delivery Network (CDN) is a service that you use to speed up your site and decrease its load time by a significant amount. Its always good to have your site powered by a Content Delivery Network. Not only does a CDN save bandwidth costs from your hosting provider, but your site becomes insanely fast and tends to rank higher in the search engines.

Here i’m going to share some top Content Delivery Network Providers that will help you to make your site blazing fast…

Why You Use CDN

  1. By using CDN service your site will load faster. A faster site always better than a slower one and one factor Google rank sites depend on site Speed.
  2. A site that loads quickly improves the user’s experience, which is crucial for optimizing conversion rates.
  3. When you use a CDN Service, your files aren’t served from your hosing server, but from a worldwide distributed network depending on the CDN provider you choose. This saves a lot of bandwidth on your actual hosting provider.

Top CDN Providers

#1. MaxCDN

MaxCDN is the best WordPress CDN Solution. Its very easy to setup and the prices are affordable. MaxCDN is trusted by leading companies like The Next Web, StumbleUpon and Washington Post and managed WordPress hosting providers like WPEngine.

>>>Visit MaxCDN

#2. Amazon CloudFront

This is the proper CDN service from Amazon. CloudFront is one of the most popular WordPress CDN with a vast network of delivery nodes. The pricing strategy of CloudFront is based on location and traffic demand. Bandwidth is usually cheaper when the data transfer is within the continent. Theres no minimum fee. you could try out their Monthly Bandwidth Calculator. Whats awesome is you can try out the full CDN experience for free. However, you’ll need a Credit Card before you can deploy your CDN. You wont be charged if you remain within the free bandwidth tier.

>>>Visit Amazon CloudFront

#3. CloudFlare

If you’ve been using WordPress for a while now, Im fairly certain that youve heard of CloudFlare. Operating for over 17 years, CloudFlare has emerged as the go-to website for free CDN and inbound traffic filtering service for enhanced security. Strangely though, CloudFlare does not have a bandwidth based pricing policy, but a flat-rate plan starting at $20/month, per domain. CloudFlare also provides real-time protection against DDoS attacks, custom site analytics and integration with an increasing number of web applications. It also have CloudFlare WordPress-Plugin.

>>>Visit CloudFlare

#4. Photon in Jetpack

Jetpack is one of must have wordpress plugin for every wordpress based sites. you can check must have plugins collection list here. It has tons of useful modules the most interesting one being Photon. Once activated, all your sites images are uploaded to WordPress.com servers (which runs on the EdgeCast network). When someone visits your site, the images are served from WordPress.com servers thereby proving you with an absolutely Free CDN for WordPress.

>>>Download Jetpack Plugin

#5. CoralCDN

CoralCDN is another peer-to-peer based CDN which was developed at MIT. Its absolutely free of cost, and requires almost zero configuration. All you have to do is append. to the files URL you re trying to download and voila you’ll get your data! I haven’t been able to figure out how this works even today. So if you’re reading this and happened to be a P2P expert, please shed some light on this topic!

>>>Visit CoralCDN For More Info

#6. Cloudinary

Cloudinary streamlines your entire image management pipeline – upload, storage, administration, manipulation and delivery. Cloudinary provide WordPress CDN Plugin. After installing cloudinary plugin you can manage image easily. Cloudinary offer 2GB free storage. see pricing table

>>>Visit Cloudinary

#7. jsDelivr

jsDeliver is a Best Free CDN which hosts popular JavaScript files. JS files are used in numerous WordPress themes, if you’ve purchased a fancy theme from ThemeForest, a lot of extra JS files are used. With the help of their WordPress plugin, you can make the JavaScript files to be served from the free CDN network,

>>>Visit jsDeliver


Here we covered top best 7 best free and premium Content Distribution Networks. We hope these providers help you to decrease your site page load times and increase conversion. 

How to Add Google Web Fonts in WordPress Blog

0

Basically that time many themes come with google fonts. All Premium themes have options for google fonts. But If your theme does’t have google fonts and you planning to use Google web fonts in your WordPress website? If you are going to do it manually with custom CSS then you should check out this useful plugin which makes it easy to change the typography of any html tag without any coding. We are discussing about WP Google Fonts plugin in this article which helps to use Google font in wordpress for any html tags including heading, paragraph, list and block quotes etc. and completely change the look of your wordpress theme.

How to Use Google Fonts WordPress Plugin

To use Google Web Fonts for WordPress, Follow bellow steps.

  1. Login to wordpress admin panel
  2. Go to Plugins >> Add new and search for WP Google fonts plugin, or download from here
  3. Install the WP Google fonts plugin and activate it
  4. Now go to Settings >> Google Fonts page
  5. Select the Google web font from the drop down combo and click on Show options link where you can select html tags such as headings and paragraph to use preferred Google font. You can also make the font bold, italic or normal as per your requirement over here.

screenshot 1

6. Once selected the html tags and done with the necessary formatting click on Save all fonts button, that’s it, checked headings, paragraph and list tags use the selected Google font.

WP Google Fonts plugin also comes with custom CSS field where you can add your own CSS to change the typography of particular ID or class in your wordpress theme.